Thursday, November 22, 2012

Happy Thanksgiving!

Happy Thanksgiving Everyone!
I am so thankful for my Hubby who works so hard at a very stressful and dangerous job. I'm thankful for my beautiful daughters who are learning the value of hard work. I'm thankful for my extended family and friends who surround me with love and laughter. I'm thankful for my Bloggy friends who share so much of their lives and talents everyday. And I'm thankful that I live in this wonderful country, which God has so richly blessed!

I know I've abandoned my blog lately and I hope if you are still with me, I promise I'm going to try harder in the coming months to keep my blog current and interesting.

So have a wonderful, safe Thanksgiving and have a good time shopping or whatever you have planned this weekend!
xxoo Nan

Sunday, August 19, 2012

My BIG Backyard Makeover Part III

This is the third and final post about my BIG Backyard Makeover! If you missed the previous post you can find Part I HERE and Part II HERE.
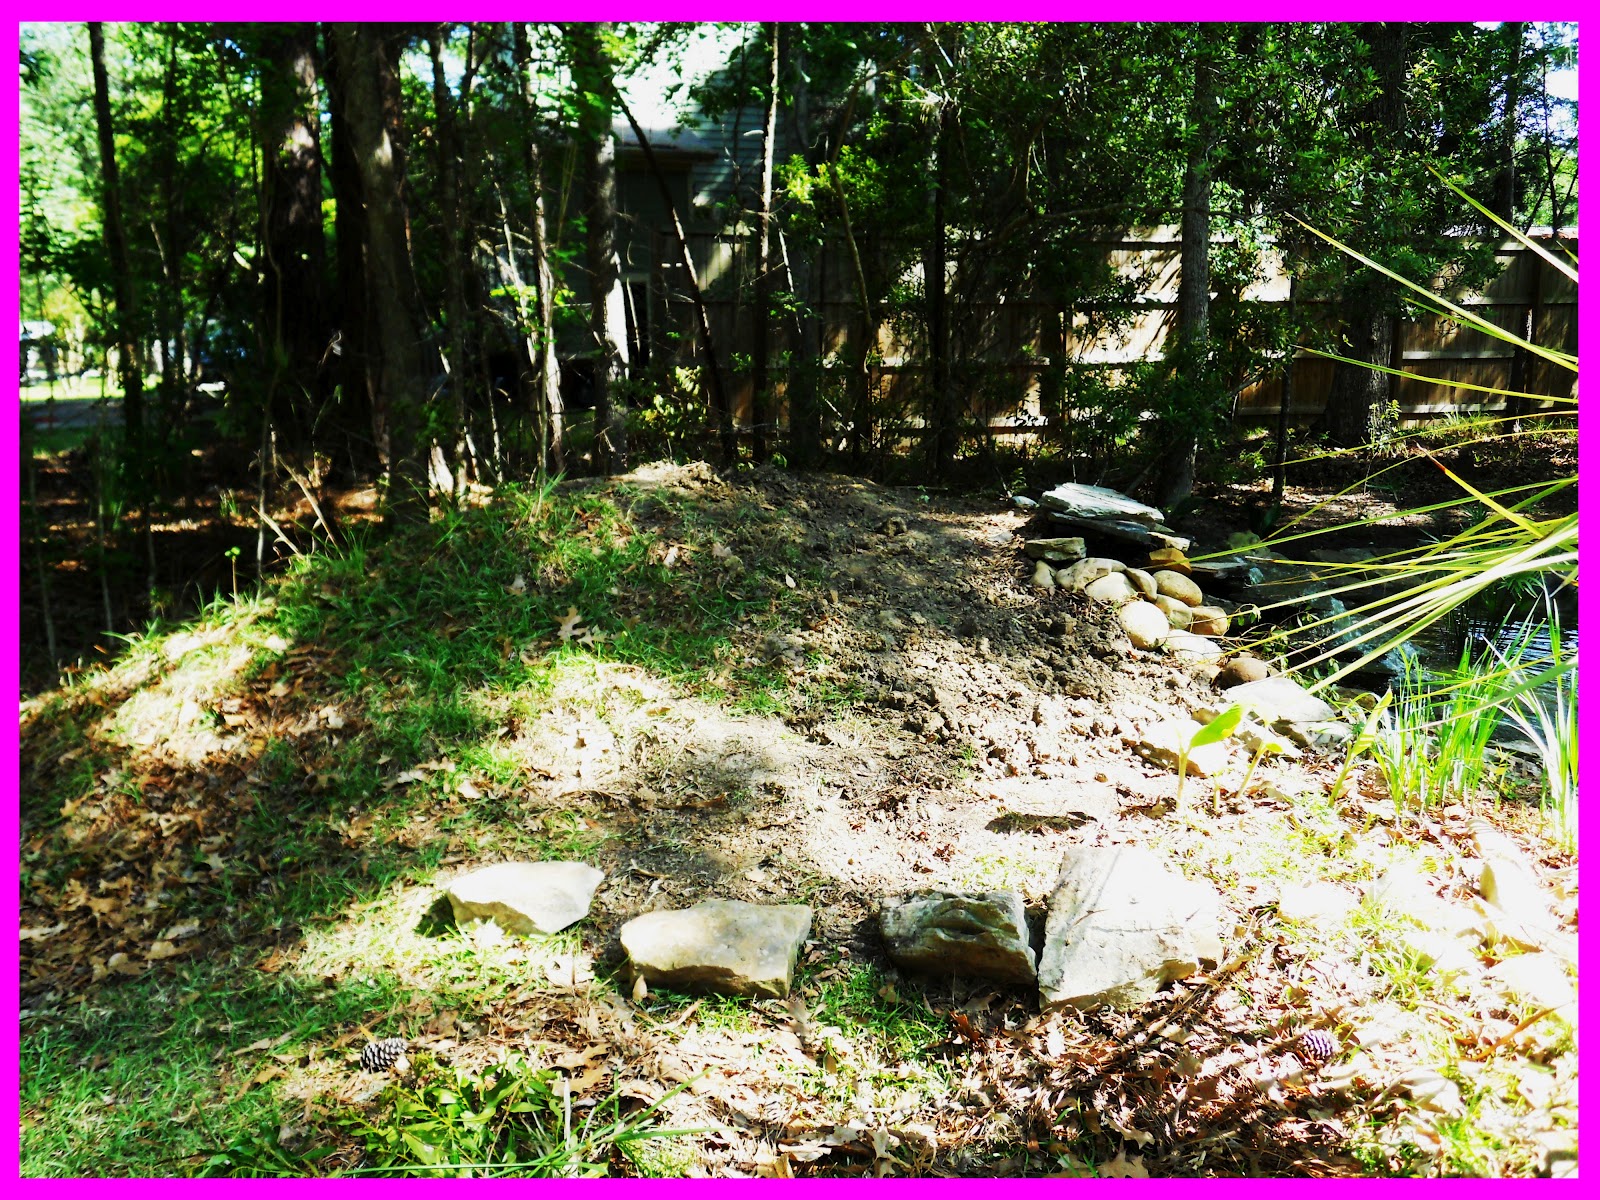
This phase consisted of the old garden shed and the area between the shed and pond. This was the most grueling part of the whole makeover. The area between the shed and pond was low and swampy and was filled with old bricks, trash, weeds, stumps and poison oak which stealthily sneaked out and attacked me! I have never had poison oak before and let me tell you, I don't want to get it again. I scratched and itched for 2 straight weeks! I also had to work with some ugly permanent fixtures. In the picture below you will see a very ugly, large black, upside down pot, it actually hides the pump for the deep well which you can see just to the left of the pot. But this area also had some great redeeming features! There are lots of tall shade trees and some existing native Palm trees. I knew this area would be the perfect place to really showcase the Tropical Caribbean feel I was trying to create! Here is a "Before" shot of the low swampy area.
I started this area by removing all the old trash and weeds, digging up all the old bricks and stumps, then raking and raking and raking till the area was fairly level. I could not bring in a lot of dirt to make it completely level because that would cause undo stress on the existing tree roots. So, to help eliminate the swampiness, I created a curvy sand "Beach" that will allow water to perk down through to the tree roots. I actually added about 1,300 lbs of sand. Next, I added lots of really cool tropical plants including Banana trees, ferns, elephant ears and some very sweet smelling Ginger.  I stretched our hammock between two trees and came up with a fun solution to hide the pump. And here is an "After" shot of the once trashy, swampy area!
The large brightly colored basket now hides the pump! It is weather proof and is made from recycled plastic bottles. I have had it for about 12 years but in it's former life was golden tan, burgundy and hunter green, nothing a little spray paint couldn't fix. The smaller basket hides the hose. The tall pole was snagged from my neighbors trash, again, nothing wrong with it that a little spray paint couldn't fix! The lantern is actually solar powered and lights up at night. Here is another "Before" shot from a different angle. This shot was actually taken after I cleaned the area up a little bit.
On the end of the shed I added a trellis with a Mandevilla vine, more ferns and Caladiums and a large, brightly painted Tera-cotta lizard that Mr Bubble and I brought home from our last cruise to Cozumel. Potted Hibiscus define the entrance to the "hidden beach". And here is an "After" shot of the same area.


And finally I attacked the old garden shed, unfortunately, I forgot to take a "before" shot so I will just have to describe to you what it looked like! The door was kind of white but mostly rusted. There was no stoop below the door so you had to step up about a foot to get into the shed. The areas on either side of the door were covered in weeds and more trash, overgrown trees and no plants or anything of interest. I removed all of the weeds and trash, cut down & pruned the trees and cut some large sweeping bedlines. Next I sanded, primed and painted the door my favorite shade of Turquoise. I brought in a shipping pallet and painted it white and the same color of Turquoise and placed it below the door for a new stoop. Next I painted some old wire baskets, lined them with some cocoa liners and hung them below the two windows and finally filled them with lots of flowers. Next I added plants and flowers to the beds and added a thick layer of mulch. Finally I gave our old wheelbarrow new life and a new purpose! It was originally painted your basic contractor orange. I painted it PINK and yellow, filled it with dirt and added lots of flowers. I'm not 100% happy with the color I painted the wheelbarrow but I'm going to let it go for now. And here is an "After" shot of the shed.

And I have one last little detail to show you. This little sign at the end of the shed points the way to the "Hidden Beach". Do you see the seashells at the bottom of the sign? Well my girls actually found them on our property when we cleared our lot, proof that we once owned Ocean Front Property, lol! 

So whats next you might ask? Well, I want to build a large firepit in the grassy area just out from the pond, complete with a pea gravel seating area and lots of brightly painted Adirondack chairs!  
I'm linking this to PINK Saturday so please stop by How Sweet the Sound and say HI to Miss Beverly!
Thanks for stopping by to see my Big Backyard Makeover! Hugs and Blessings, Nan

Saturday, August 18, 2012

My BIG Backyard Makeover Part II

Hi Everybody and Happy Pink Saturday!
This is the second part of My BIG Backyard Makeover. If you missed Part I, you can check it out HERE
As I told y'all in my previous post, Mr Bubble and I own almost two acres, the majority of which have never been touched by human hands. Mr. Bubble has been working on the West Coast all Summer so I decided to surprise him with a tropical, Caribbean themed backyard makeover. I concentrated on an area centered around our pond, it measures about 70 feet long and includes a shed, the pond, a natural area between the pond and shed and a large berm (mound of dirt). Today I'm going to show you the berm and the pond makeover. There's a lot to see, so let's get started!
Mr Bubble and I built the pond about seven years ago and one of the results of building a large pond is the large amount of dirt that has to be dug out. Well that dirt has to go somewhere, so Mr Bubble and I bermed it up behind the pond to create the waterfall. We have never really done anything else with that large pile of dirt so it had become overgrown with weeds and just looked awful. Here is a shot of the area before I started.
 The first step was to level the dirt and give the berm a nice rounded shape. I had to dig and dig and dig some more. Once I had the berm shaped, the next step was to build a stone retaining wall. I dry stacked the stones ( meaning they are not mortared together) two high then filled the area with some really rich dirt. Once this was done, I removed any remaining weeds and replanted the area with some great tropical plants. I wanted the area directly behind the waterfall to be a focal point so I planted two large Alocasia Odora, sometimes called Elephant Ears. If there is a drama queen in the plant world, it would be this plant! I also planted a Croton, the smaller plant with the multicolored leaves. On the berm I planted some Kimberly Queen Ferns, along with some pretty PINK Vinca and PINK Portulacca. Here's an "AFTER" shot of the berm.


Next I tackled the area around the pond. A couple of years ago I thought it would be a good idea to put a large border around the pond about 4 feet out from the edge. The border consisted of large rocks and pea gravel ground cover. Well it turned out to be a really dumb idea! It was impossible to keep the gravel clean and free of weeds and leaves. Here's a shot of the pond before I started, yes, my Jack Russell Hippy loves to swim!
 First I raked up all the gravel and took up the large rocks. This was back breaking work but I was determined to follow through. Next I laid out and cut a nice, new, curvy bedline, added lots of new plants and put down a nice dark brown hardwood mulch. And here's an "AFTER" shot of the same area.

Most of the existing plants were located on the front side of the pond which is really sunny while the back side which is really shady had very few plants. I was really excited to plant the shady side because some of my favorite plants thrive in the shade.  I added three more varieties of Elephant Ears, a Chinese Fan Palm, a Blue Endless Summer Hydrangea, a PINK Mimosa Tree, PINK Caladiums, a Giant Leopard Plant, PINK Impatients, Society Garlic, Ti plants and more Crotons. I want to add more plants and I know I need more color but it is just too hot right now to plant anything. Now I'll shut up and just let you look at a few more "BEFORE" and "AFTER" shots.
 Tomorrow I will show you what I did with the shed and the natural area between the shed & pond. Please stop by How Sweet the Sound where Beverly has more amazing PINK posts waiting for you! Hugs and Blessings, Nan

Friday, August 17, 2012

MY Big Backyard Makeover!

This post will be the first of two and maybe three, revealing my BIG backyard Makeover! Mr. Bubble and I have almost two acres, the majority of which have never been touched by human hands. I decided that THIS was going to be the Summer that I tackled one small area and since he has been working on the West Coast all Summer, it was the perfect opportunity to surprise him with a Makeover! I have been a Landscape Designer for over 27 years now but most of the time my clients want a very traditional design, so for my own yard Makeover, I decided to think way outside the box and come up with something really fun and unique. Thanks to Pinterest, I was able to find so many great ideas that I decided to create some inspiration boards. I'll let you see if you can figure out my Makeover "theme"!

This fist board is all about color.
 As you can see, I wanted a bright, happy color scheme!


This next board is all about plants.

I wanted plants with BIG, bold foliage. This is easy to accomplish here in Charleston as many topical plants thrive in our hot, humid summers. Banana Trees, Hydrangeas and Elephant Ears are some of my favorite plants. In fact; I used about seven different varieties of Elephant Ears.

This last board was my inspiration for some of the ideas I wanted to incorporate into my landscape Makeover!
 So have you guessed my theme? Well, in case you haven't, I wanted to create a lush, tropical, Caribbean feel! 


Tomorrow I will post before and after pics so you can see my whole Makeover project start to finish! If you would like more inspiration, please visit my 
Pinterest Boards where you will find all these pictures and more with their sources listed. I'm linking this post to Jenny Matlocks and Alphabe Thursday for the letter M. Thanks for stopping by today! Hugs and Blessings, Nan

Friday, July 27, 2012

Flamingo PINK!

Happy PINK Saturday everyone! 
And a very special PINK Saturday it is, 
as Ms Beverly is celebrating her Birthday! 


I hope all of you will stop by How Sweet the Sound and heap the Birthday Wishes on this special Lady!
I FINALLY have some PINK to share with you, my new Flamingo PINK Fiestaware! 

This color was just released by the Homer Laughlin Company and I could not wait to get my hands on a place setting of my own.
Don't you love this shade of PINK?!
Now, I realize this post might be a little boring for some. I don't own oodles and oodles of Fiestaware. In fact; I only own one place setting of 10 different colors. And I don't own oodles and oodles of fancy accessories or matching tablecloths. But I love my small collection of Fiestaware and think surely, they must be the "happiest" dishes ever manufactured!
Here are a few of my favorite color combinations with my new Flamingo Pink. 

Flamingo Pink, Turquoise and Sunflower Yellow


Flamingo PINK, Marigold and Sunflower Yellow


Flamingo PINK and Lemongrass

Do you have a favorite combination?

Now I need your help! Our yard is almost 2 acres and the majority has never been touched by human hands. I decided THIS was the Summer I was going to work on a small area and create a little tropical get-away which, I hope to show you next week. I'm stumped on one thing, the color for the door on the old garden shed.


 So which color do you like, the paler turquoise on the left, or the brighter turquoise on the right! 
I hope y'all have a Happy PINK Saturday and a fabulous weekend! xoxo Nan

Wednesday, July 18, 2012

RED, ripe, Tomato Pie!

Would you look at all these beautiful RED tomatoes!


So what do you do when you have a bumper crop of tomatoes? Well, if you live in the South, you make Tomato Pie! Add a pie shell, some cheese, mayo and Basil and you have all the Ingredients for a wonderful, light summer meal.


Tomato pie is a very old Southern dish, going back many generations. The Ingredients were items that most cooks would have on hand and it is quick and easy to prepare. Serve it up with a salad, some garlic toast and a tall glass of sweet tea and as they say in the South... that's some good eatin!
So here is my recipe for Tomato Pie, I hope you will give it a try and let me know what you think!


Tomato Pie
Ingredients:
1- 9 inch deep dish pie shell
1/2 sweet onion, chopped
3-4 ripe, firm tomatoes
1/4 Cup fresh, sliced basil
2 Cups grated cheese (cheddar or Monterey Jack)
3/4 Cups Mayo
1 Tsp (or more) Franks Hot Sauce
Salt & Black Pepper
and MY secret Ingredient: 5 - 6 slices cooked, chopped bacon


Preheat oven to 350º, place pie shell in oven and bake for 8 -10 minutes until lightly browned.
Cut the tomatoes in half and gently squeeze to remove excess juice then roughly chop and spread on paper towels to absorb any additional juice. I can not stress how important these two steps are! If you skip these steps, the pie shell will be soggy and your pie filling will be runny!
Next, in a large mixing bowl, put the chopped tomatoes, sliced basil, chopped bacon, onions and salt & pepper and lightly toss to mix. Spread evenly in the bottom of the pie shell.
In a separate bowl mix the cheese, Mayo and Hot Sauce. The mixture should be very soft & gooey. Spread the mixture over the tomatoes and using a spatula, spread to the edges of the pie shell. Bake at 350º for 30-35 minutes. Let cool 10 - 15 minutes and slice.
Ahhh, looks like the perfect place to sit and enjoy a slice of Tomato Pie and sip my tea!


I'm linking this post to:
Vintage Thingie Thursday at Colorado Lady
and Alphabe Thursday for the letter I for Ingredients at Jenny Matlock's

Friday, May 25, 2012

Happy PINK Saturday!

Happy PINK Saturday everyone!
AND...
Happy 4th Birthday to PINK Saturday!

Congratulations to Beverly at How Sweet the Sound for hosting PINK Saturday every week and bringing us all the PINKness we can stand. 
Today I want to show you what I created and what I received in a recent swap. The criteria of the swap was to create a 12"x12" canvas containing nine squares, 2"x2". After contacting my swap partner, Susie at South City Hues, I found out her tastes were very similar to mine! 

I started out by washing the canvas with a soft shade of PINK acrylic paint. Once it was dry, I brushed on a pale shade of cream but this time I went back over with a dry brush and "lifted" some of the paint off of the canvas. Then the canvas sat there for two weeks because I couldn't decide what to do next. I started thumbing through my vintage images and a clear theme started to emerge, vintage Bluebirds! Here is a shot of the finished board. 
 Here is a close up of the sweet fairy tale girl with her bluebird friends.

And here is a close up of a couple of the squares. 

This is the fabulous canvas Susie sent to me!

She visited my website and borrowed some of the pics to use on my canvas, how clever was that?!
That little munchkin with the party hat on, ready for Beverly's PINK birthday party, is yours truly! 

And this sweet baby is my very own mom!

She even included a picture of my Midge doll!

And it didn't stop there! Susie tucked in all kinds of extra goodies like a sweet vintage book and hankie. 
Thank you for being such a great swap partner Susie!

Have a wonderful weekend and a safe memorial day!  
 And don't forget to stop by Beverly's and wish PINK Saturday a Happy Birthday! xxoo Nan

Tuesday, May 22, 2012

America: RED. White and Blue!

With Memorial Day just the blink of an eye away and the Fourth of July just around the corner, I wanted to share some vintage patriotic pictures. I don't remember where I originally saw these but I have had them for a long, long time. So long in fact, I had to go to the external hard drive on my old desktop to find them. I would like to give credit where credit is due, so if any of you know where I might have gotten these, please let me know! 
 I have always loved Paper dolls and I think these are just about the sweetest ones I have ever seen! 

 Can't you just see a little girl in the 40's, sitting on the floor playing with these paper dolls while her family gathered around the radio, listening to the latest news from the war front! 

 I know these are scary times we live in now but imagine waiting and waiting and waiting to receive any news, before there were instant pictures and news coming across your TV screen or computer. 

 Imagine how scary it must have been as the news of Pearl Harbor reached the mainland. As families every where across America held their breath and listened as President Roosevelt gave his now famous Pearl Harbor speech. 

 I wasn't alive during World War II but it was probably the last war that our Country was united. I don't think I have EVER heard anyone say "we never should have gotten involved in WWII". 

 Regardless of your feelings about more recent conflicts, I hope that all of us take a few minutes this weekend to remember those who sacrificed everything so that we might enjoy the freedoms so many take for granted and to thank those who have served this great nation! God Bless America!
I'm linking this post to:
Vintage Thingie Thursday at Colorado Lady
and Alphabe Thursday for the Letter A at Jenny Matlocks

Friday, May 11, 2012

Happy PINK Saturday & Happy Mothers Day!

Happy PINK Saturday
and Happy Mothers Day!
Please stop by How Sweet the Sound where our host Ms Beverly, has some wonderful PINK posts waiting for you!
Today I have a two sweet Mothers Day images and poems just for you! Both of the images are by one of my Fav artist, Mabel Rollins Harris.

 Have a wonderful weekend, filled with Bubbles of JOY! xoxo Nan

Wednesday, April 25, 2012

W is for Whoopie ... Pies that is!

W is for Whoopie... Pies that is!
Was there ever an episode of The Newlywed Game where Bob Eubanks did not ask the contestants "Where is the last place you made Whoopie"? Well, I can honestly say IN THE KITCHEN! 


No, not THAT kind of Whoopie! This kind of Whoopie ... Whoopie Pies! 


While playing on Pinterest, I noticed I kept seeing recipes for Whoopie Pies and decided I better start a new  PIN board just for Whoopie Pies because I knew sooner or later, I would want to try my hand at making them.  Now I've eaten Whoopie Pies before, they are a very popular item at Amish bakeries but I have never made them myself. Well, the opportunity came sooner than I would know as I decided to take them to a neighborhood meeting/dinner. For my first attempt, I wanted to try an easy recipe, possibly one that started with a cake mix, sure enough, I found THIS recipe. I made two batches, I used a devils food cake mix for one batch and red velvet for the second batch. 

 Look at the pretty red color!

The recipe says to drop the batter on to parchment lined cookie sheets but I made it even easier and bought 2 Whoopie Pie pans at Target! I used a cookie dough scoop to fill the cavities. I filled the scoop  to the top but in hindsight, it was probably a little too much. 


 Here's a shot of the pans filled. 


And here's a shot of the finished Whoopie pies, cooling. 
 By the time I made all of these and put the filling in between, I was really running behind schedule and completely forgot to take a picture before I left for the meeting. You just have to take my word for it, they looked and tasted WONDERFUL! Make sure you check out the other Whoopie Pie recipes on my Pinterest board and don't forget to stop by Jenny Matlocks for more inspiring W posts at Alphabe Thursday! xoxo Nan